How to Send a Paper Letter from an Email Attachment
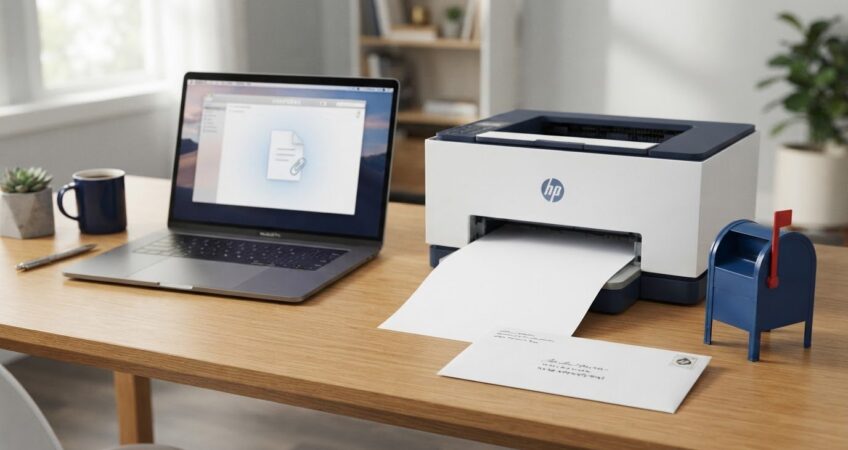
You can turn an email attachment into a physical letter by printing it, placing it in an addressed envelope, adding postage, and mailing it, or by uploading the file to a print-and-mail service like Postal Methods. To send paper letters from email, use the attachment as the document to be printed, ensuring it meets standard mailing requirements. A standard 1-ounce U.S. letter requires careful formatting before it is mailed.
Email is quick, but it doesn’t put a paper letter in the recipient’s mailbox. When you need a signed, printed, or mailed letter, preparing it yourself can mean extra steps. This guide explains how to send paper letters from email, whether you’re working with an attachment or the message itself, and when a digital email is enough.
You’ll learn how to handle a PDF or other uploaded file, what to do with an attachment already in your inbox, and how postage and envelope size affect mailing. Then you can choose the simplest route: send the message digitally or move it from screen to mailbox.
Key Takeaways
- Choose between emailing the letter and mailing a printed copy based on whether the recipient needs a physical document.
- Prepare an uploaded file with the letter, recipient address, and layout ready before sending it for printing and mailing.
- Check envelope dimensions, thickness, and weight so you can determine the right postage for a U.S. letter.
- Use an email attachment as the source document for a printed letter, then review the final file for readability and accuracy.
- For recurring business mail, printing and mailing services can help move documents from digital files to recipients’ mailboxes.
How do I send a letter?
Choose between printing and mailing the letter yourself or using an online service to handle the document and postage. Email-to-mail services reduce hands-on work, while self-mailing gives you direct control over printing, envelope preparation, and postage.
-
Choose an Online Printing and Mailing Service
Compare the steps a service handles, such as printing, folding, inserting, applying postage, and mailing. Before submitting, make sure the workflow supports your document format, recipient address, and mailing type. Regular First-Class Mail and Certified Mail serve different purposes. Certified Mail with a Return Receipt is available from USPS when you need the recipient’s signature.
For a black-and-white mailing, review the document on screen before submitting it. Confirm that the text, signatures, and essential details remain readable without color. Check what the chosen mailing service includes, since paper, mail class, and postage affect the finished letter.
-
Upload a PDF for Printing and Mailing
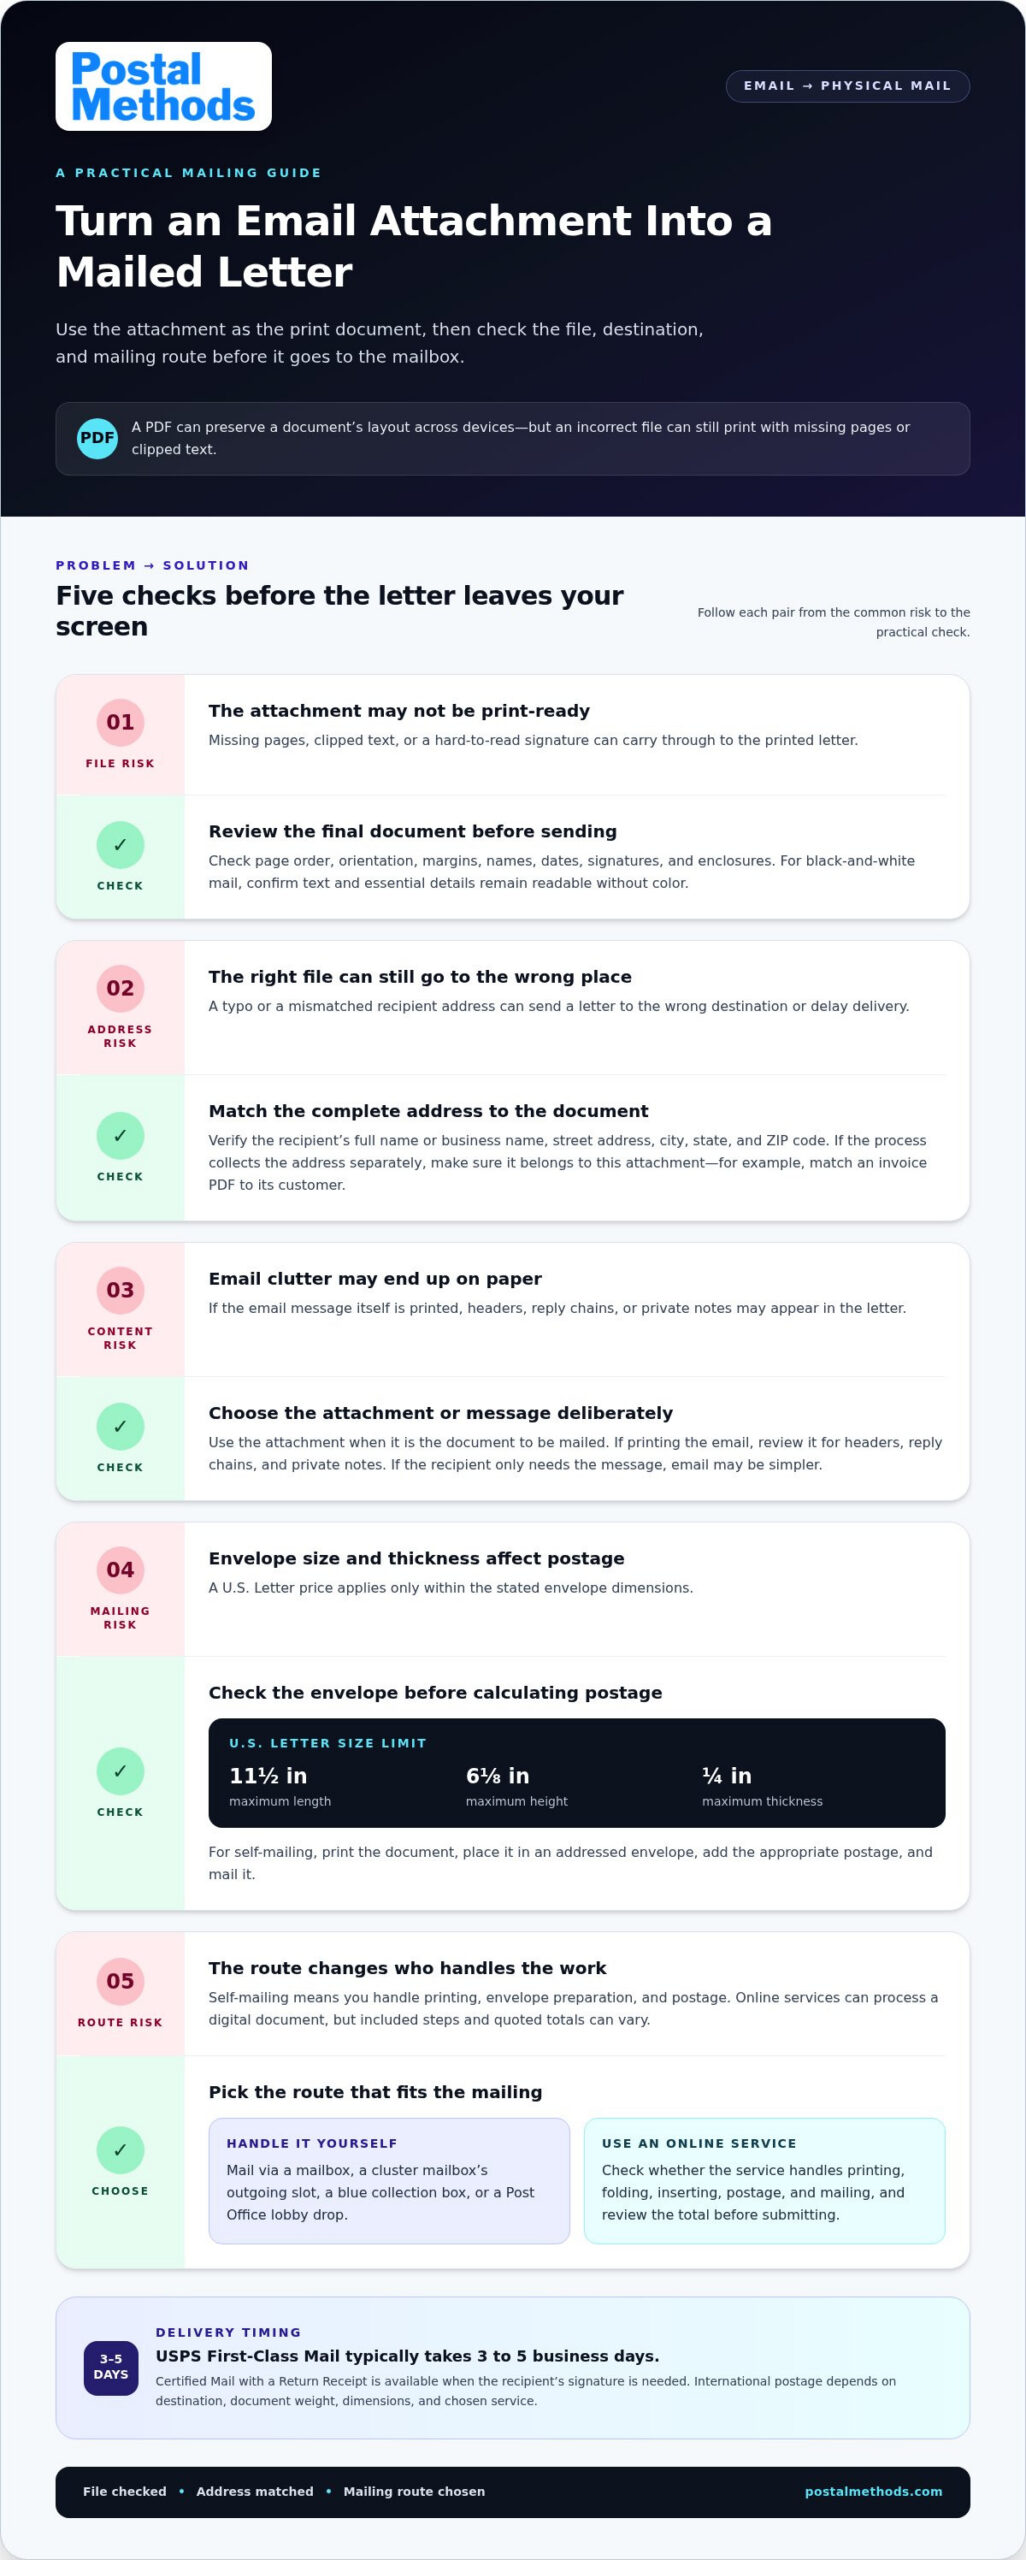
Save the final document as a PDF, then upload it using the service’s submission process. Review the page order, orientation, margins, and address before submitting the mailing. A PDF helps preserve the layout across devices, but an incorrect file can still print with missing pages or clipped text.
Use a complete recipient address and make sure it matches the intended envelope. For invoices, notices, or legal documents, check names, dates, and enclosures carefully. Keep a copy of the approved PDF so you can refer to the exact version submitted.
- Calculate postage for self-mailing. A U.S. Letter pricing applies to envelopes no larger than 11-1/2 inches long by 6-1/8 inches high and 1/4 inch thick.
- Choose the mailing route and review the total before submitting. USPS First-Class Mail typically takes 3 to 5 business days. International postage depends on the destination, document weight, dimensions, and chosen service, so prepare those details for the postage calculation. If an online platform uses mailing credits, treat them as a way to fund mailings, not as a postage rate; review how the order’s print and delivery choices affect its quoted total.
- Mail the prepared letter yourself or submit it digitally for processing. To mail it yourself, use a mailbox, a cluster mailbox’s outgoing slot, a blue collection box, or a Post Office lobby drop. An online service can handle printing and postage, while self-mailing keeps those tasks in your hands.
Sending a physical letter from an uploaded document or PDF
Use an uploaded document when the recipient needs a printed letter delivered by mail. Before sending, make sure the file, recipient details, and delivery method match.
- Prepare the file and confirm that the recipient needs paper. Open the final document and check names, addresses, dates, and page order. A PDF can preserve the layout between devices. Make sure the text is readable and no signature or attachment is missing.
Use a physical letter for a printed notice, signed correspondence, or a document the recipient needs to handle on paper. If the recipient only needs the message, email may be simpler. Decide first so you don’t print and mail something that could be sent digitally.
- Enter the recipient’s mailing address carefully. Include the full name or business name, street address, city, state, and ZIP code, then compare it with the address in your records. A typo can send the letter to the wrong place or delay delivery.
Keep the recipient information separate from the letter text when the online mailing process asks for both. Check that the address is assigned to the correct document. For example, match an invoice PDF to its customer’s address before submitting it.
- Choose how the document will become a physical letter. You can print it yourself—or turn to a rapid print provider like Printbox London (Same Day Printing London) if you need hard copies produced quickly—place it in an addressed envelope, add postage, and mail it through a mailbox or Post Office lobby drop. Or submit a file through an online letter-mailing service, which handles printing and mailing.
USPS First-Class Mail typically takes 3 to 5 business days, according to the United States Postal Service. Allow for delivery time when the letter supports a deadline. Certified Mail with a Return Receipt is an option when you want the recipient to sign for delivery.
- Use an email body when the recipient needs a message, not a mailed document. Write a clear subject line, address the recipient, and put the letter’s text in the email. Attach a PDF when the recipient needs a copy in its original layout, such as a letterhead document.
If you need to send a paper copy of an email, print the message or prepare its attachment as the mailing document. Review the content for email headers, reply chains, and private notes that shouldn’t appear in the letter.
- Choose an online route for repeated letters or when you want to avoid handling each envelope. An Email-to-Mail Service can move a digital document into a physical mailing workflow. For example, you can use email-to-mail document processing when a file needs printing and delivery rather than an email-only reply.
Before submitting, review the final document and destination together. Confirm that the digital message, uploaded file, and recipient address all refer to the same correspondence. That final check helps prevent mismatched letters and keeps sending steps clear.
Sending printed letters from email attachments
Sending an email attachment as a physical letter generally involves printing and handling before postal delivery. Printing and handling time comes first; USPS First-Class Mail typically takes 3 to 5 business days after mailing, according to the United States Postal Service.
- Open the email and identify the file intended for printing. The attachment may be the letter, while the email body may contain instructions or extra correspondence. Separate the document from the surrounding message so private notes, reply chains, and unrelated details don’t end up in the printed letter.
Check the attachment’s filename before opening it. For example, “final-letter.pdf” is easier to distinguish from a draft than “document1.” If the message contains several files, identify which one belongs to the recipient before printing or submitting it for postal delivery.
- Open the attachment and use the print command to make a paper copy. For a PDF, review the print preview first. Check that the pages are in order, the text isn’t cut off, and the document fits the page. The preview can reveal an empty final page or a signature outside the printable area.
If printing the email itself, use its print button and review the displayed message first. Headers, sender details, timestamps, and quoted replies may appear on the page. Print only the material that belongs in the letter, especially when the thread includes internal comments.
- Decide whether to prepare the envelope yourself or use an email-to-mail service. For self-mailing, put the printed pages in an addressed envelope, add the correct postage, and use an accepted postal drop-off point. For online mailing, follow the service’s instructions to submit the email or attachment and enter the destination.
Keep the document and recipient information together throughout the process. For example, if an email includes an invoice attachment, pair it with the correct mailing address. A mismatch can send a sensitive or important document to the wrong recipient.
- Allow for both processing and postal transit. The time between email submission and printing varies with the service’s processing schedule. Postal transit begins after the letter enters the mail stream. USPS First-Class Mail typically takes 3 to 5 business days, according to the United States Postal Service, so include mailing time when planning around a due date.
Use a tracking or signature service when delivery confirmation matters. USPS Certified Mail with a Return Receipt can provide a recipient signature. Keep a copy of the sent email and final attachment, and record the mailing date and any receipt details for your files. This level of documentation is particularly valuable when managing formal legal correspondence or injury claims, where resources like abc-attorney.com emphasize maintaining an accurate paper trail.
Emailing a letter
Choose email when the recipient needs the message digitally, not a physical copy. To share a letter you received on paper, scan it and attach the image or PDF.
- Decide whether to write in the email body or attach a file. For a new message, type the letter directly into the email when the recipient only needs its contents. This keeps the text easy to read across devices. Use an attachment when the recipient needs a copy of a paper letter or a document that must retain its layout.
For example, send a short appointment update in the email body. Attach a scanned copy when forwarding a signed letter you received by mail.
- Enter the recipient’s email address after drafting the message. Check each character, especially names and domains, before sending. If the email has several recipients, use the appropriate recipient fields and consider whether they need to see one another’s addresses.
For example, send a customer’s invoice letter to that customer’s address, not to a similarly named contact. A correct street address matters for a mailed letter, and an accurate email address matters for a digital one.
- Write a subject line that identifies the letter’s purpose. “Updated appointment details” gives the recipient more context than “Hello.” Open with the recipient’s name, state the purpose, and close with your name and contact details. Keep the message focused on one topic so the recipient can understand it quickly.
Before sending, read the message from the recipient’s perspective. Check names, dates, and any requested action, such as replying with an approval.
- Attach only the file the recipient needs. If you’re sharing a paper letter, scan the complete document and check that every page is readable and in order. Give the attachment a clear filename, such as “Signed-agreement.pdf,” rather than “scan001.” Open the file once before sending to confirm it’s the right version.
Review the email body and attachment together. A message saying “Please see the attached letter” should include the intended file, not an unrelated draft or an empty scan.
- Use the email’s final review screen before selecting Send. Confirm the recipient’s email address, subject, message, and attachment together. A scanned copy can show the contents of a paper letter, but it doesn’t deliver the original physical document.
For a paper copy that must reach a mailbox, email alone isn’t enough. Prepare the letter for postal delivery. Choose email when the recipient can act on the digital message, and physical mailing when they need paper in hand.
How can I send a paper letter from an email?
Start with the email or attachment, then choose how to turn it into mail. You can print and post it yourself or use an online service to handle the physical mailing steps.
- Decide what should appear on the printed letter. If the email itself is the letter, use the print button and review the preview first. Remove reply chains, private notes, and unrelated email details. If the letter is an attachment, open the correct file and check every page before printing.
For example, print a short email when its text is the complete correspondence. Use the attached PDF when it contains letterhead, a signature, or a specific page layout. Keep the email body and attachment distinct so you don’t mail instructions by mistake.
- Check the printed document before preparing the envelope. Confirm that names, dates, signatures, and page order are correct. Look for clipped text, blank pages, or comments meant only for the email thread. If the attachment is a scan, make sure every page is readable and correctly oriented.
Match the document to its recipient. For instance, pair a billing letter with the intended customer’s address, not another contact from the same email chain. This comparison helps prevent mailing a document to the wrong person.
- Prepare the mailing details. Put the recipient’s complete postal address on the envelope, including the street, city, state, and ZIP code. Add your return address in case delivery fails. Check that the envelope closes securely and the pages fit without making it bulge.
Choose USPS Certified Mail with a Return Receipt when you want the recipient to sign for the letter. For ordinary correspondence, select a suitable mailing method and postage based on the envelope’s size and weight.
- Mail the envelope through a U.S. mailbox, a cluster mailbox’s outgoing slot, a blue collection box, or a Post Office lobby drop. Visit the Post Office counter if you need help with postage or want to arrange a mailing service. Keep any receipt or mailing record with your copy of the final document.
A stamped letter weighing more than 10 ounces must be given to a Post Office employee, not placed in a collection box. A stamped envelope thicker than 1/2 inch also must go to an employee.
- Choose an online workflow to avoid printing, folding, stamping, and mailing each letter yourself. Prepare the digital file and recipient address, then submit them through the service. Review the mailing details before placing the order.
If you want to move a digital document into the mail stream, prepare a letter for online mailing. Keep a copy of the submitted file and correspondence so you can refer to the exact version you sent.
Postal Methods: HIPAA Compliant Printing & Mailing Services
Postal Methods turns digital documents into physical mail through its printing and mailing services. Use the service when recurring correspondence, sensitive medical documents, invoices, legal documents, or notices need to be mailed rather than sent by email.
Choose the service that fits the document: HIPAA Compliant Printing & Mailing Services for sensitive medical correspondence, Invoice Printing and Mailing Services for billing documents, Legal Printing and Mailing Services for legal correspondence, or Notice Printing and Mailing Services for notices. Postal Methods handles printing and mailing, so you don’t have to prepare each piece yourself.
For a letter that begins as an email or attachment, prepare the document and recipient information for the mailing workflow. Visit Postal Methods to learn more or discuss your printing and mailing needs.
Make your next mailing easier to manage
Set a simple rule for your next letter: decide who needs the document, whether they need paper, and who will prepare it. A clear handoff can keep an email attachment from becoming an unfinished task in someone’s inbox. If your team regularly needs to send paper letters from email, make document preparation and mailing part of a repeatable workflow.
Postal Methods offers HIPAA Compliant Printing & Mailing Services for medical documents, Invoice Printing and Mailing Services, and Legal Printing and Mailing Services. These options suit recurring correspondence that needs to move from a digital file to physical mail. Choose the workflow that matches the document, then prepare the recipient details and final file for processing.
Ready to discuss printing and mailing for your business correspondence? Contact Postal Methods for help. Take the next step with a clear document, a confirmed recipient, and a mailing process your team can use again.
Frequently Asked Questions
Which services print and mail letters from email in the United States?
Postal Methods provides an Email-to-Mail Service for turning digital correspondence into physical mail. Businesses can also submit documents for printing and mailing through the QuickSend Portal or RESTful API. For specific workflows, Postal Methods offers Invoice Printing and Mailing Services, Legal Printing and Mailing Services, Notice Printing and Mailing Services, and HIPAA Compliant Printing & Mailing Services for sensitive medical correspondence.
How do email-to-postal-mail services work, step by step?
To send paper letters from email, prepare the message or attachment, provide the recipient’s mailing details, and submit the material through a supported channel. Postal Methods accepts submissions through its portal, email, or API. The service prints, folds, stamps, and mails documents. For example, a business can submit an invoice instead of printing and preparing each envelope in-house.
How much does it cost to print and mail a letter from email?
The price depends on the document and mailing choices, including page count, color or black-and-white printing, postage, and added assembly needs. Postal Methods uses prepaid pricing, with charges affected by the selected package and any applicable letter options. The price for a specific mailing depends on the case and is given after a quote request. Consider the full job, not postage alone.
What file formats, page limits, and envelope options do letter-mailing services accept?
Postal Methods accepts documents through its portal, email, and API, including PDF uploads. Email submissions have a 25 MB attachment limit. The service supports letter add-ons such as additional pages, single- or double-sided printing, perforated paper, and reply envelopes. Choose options based on what the recipient needs, such as a reply envelope for returning a completed form.
Can I send certified, registered, or tracked mail from email?
Postal Methods offers Certified Mail in black-and-white, with a “No Return Receipt” option and a separate “Signature Required” option. Choose Signature Required when proof of the recipient’s signature is needed. These are distinct choices, so don’t assume a return receipt comes with every Certified Mail order. Registered or other tracked mail options are not described as part of this workflow.
Are email-to-mail services secure for sensitive documents?
Postal Methods offers HIPAA Compliant Printing & Mailing Services for sensitive medical documents, including patient communications. Its operations are SOC 1 and SOC 2 certified. Businesses can submit documents through the portal, email, or API, then use the mailing workflow for physical delivery. For example, a healthcare organization can route patient correspondence through a service designed for compliant printing and mailing.